Easy ERP lets you keep track of your sells by managing customers and their orders, including the basic order life cycle.
1) Creating and managing customers
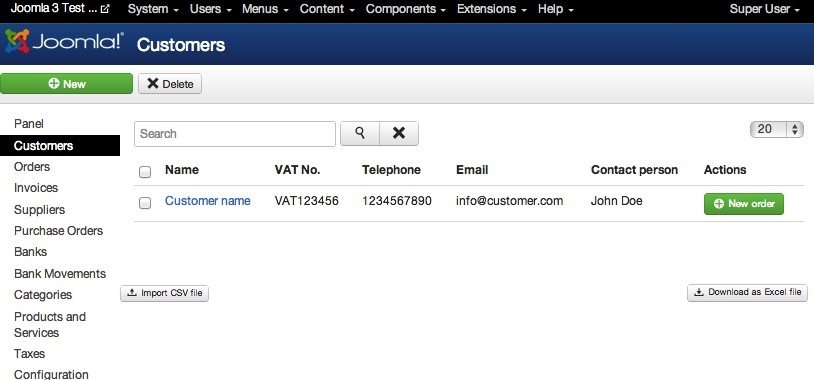
To create a customer, go to the “Customers” screen and press the “New” button:
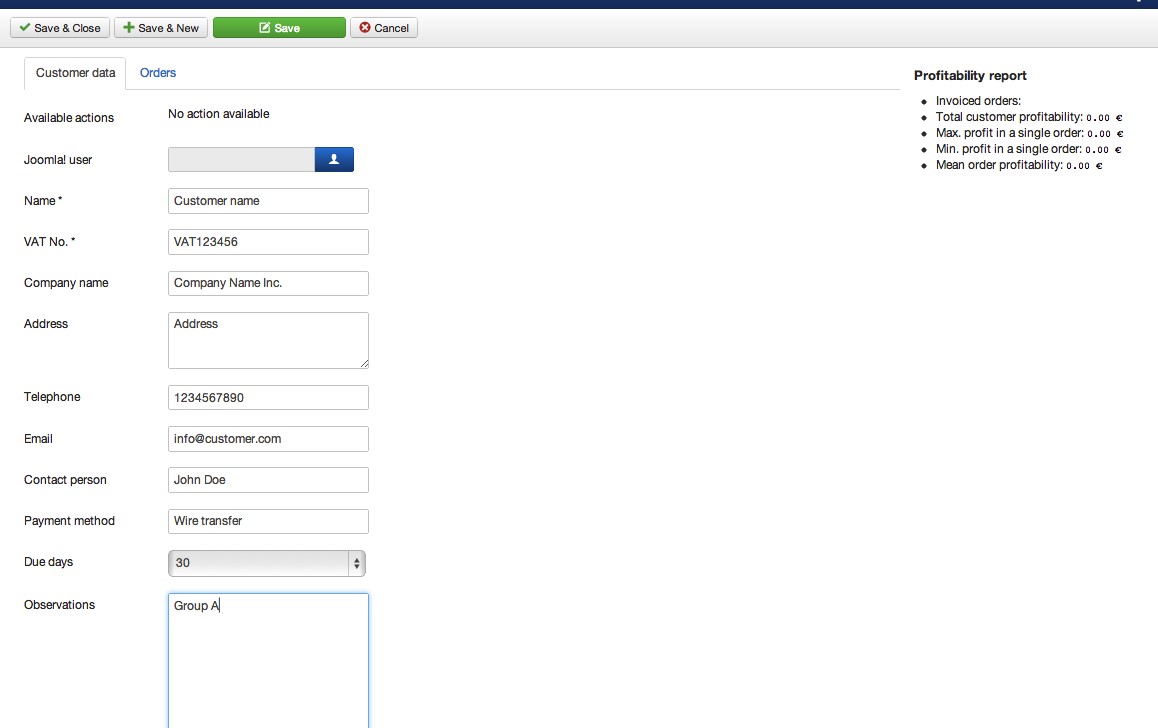
A customer record contains the following fields:
- Joomla user: this is the user name that your customer can use to access the frontend private area.
- Name: the name of your customer.
- VAT No. : your customer's VAT number.
- Company name: your customer's company name as it has to be shown in invoices.
- Address: your customer's address.
- Telephone: your customer's phone number.
- Email: your customer's contact email.
- Contact person: the name of your contact person in your customer's company.
- Payment method: a simple text field to have a note about how your customer prefers to make its payments.
- Due days: This field will be used to calculate the expected payment date for your customer's invoices.
- Observations: this is your private record about this customer. The notes you take here will not be shown.
Once you save a customer, you will see a new field in the form with the title “Available Actions”. You will see this kind of field in other screens too, to give you access to the different task you can do on a particular artifact (customer, supplier, order, invoice, etc) depending on its state:

In this case you will be presented a button to create an order for this customer. There is another way of doing this, by clicking in the corresponding button in customers listing:
2) Importing customer from CSV files
As with other kinds of data, Customers can be created in bulks by importing CSV files. In the customers screen, click on the “Import CSV file” to open the import dialog:

3) Analyzing customers profitability
As we saw in the chapter about products and services, each item you sell has a cost price registered. This way when you register an order for a particular customer, Easy ERP can calculate how much revenue you get from it.
When you open a customer's record, you will see a profitability report like this:

The profitability report will show you this data:
- Invoiced orders: the number of orders that have generated invoice for this customer (orders that do not have invoice are not counted).
- Total customer profitability: the total amount you have earned with this customer.
- profit in a single order: the biggest amount you have earned with this customer in a single order.
- profit in a single order: the smallest amount you have earned with this customer in a single order.
- Order profitability: the average revenue of this customer's orders.
4) Creating orders
The first thing to note about orders is that they are not created from the Orders view (there is no “New” button there). Instead, orders are created from the Customers view, by clicking in the “New Order” button of the corresponding Customer:
Then, you will get to the order screen where you can fill the data about the order. this form has two tabs: one for general data and another one for the items included in the order.
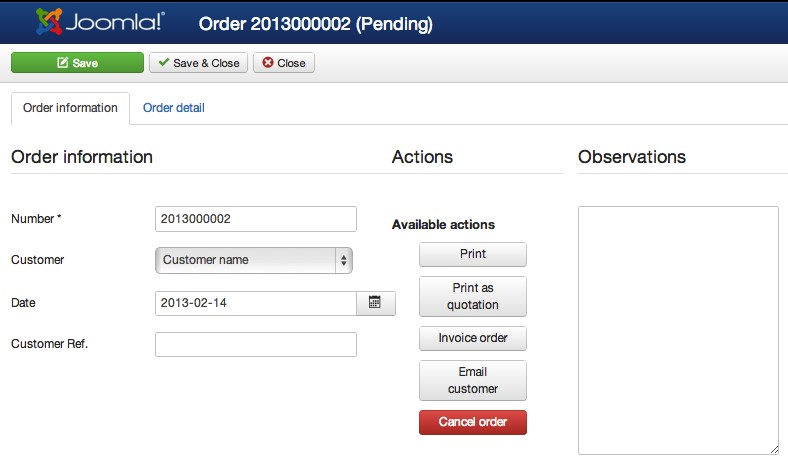
The data you have to provide about the order include the following fields:
- Number: this is the unique order number, generated as a sequence using the “Next order number” you provided in “Configuration”.
- Customer: the customer of this order.
- Date: the date of this order (by default, the current date).
- Customer ref (optional): here you can fill a reference provided by your customer if he wants it to appear in the printed docs, ie. their purchase order number.
- Observations: this field is for your private record about this order. Whatever you type here will only be visible in this screen, but not in printed documents nor in the frontend of your site.
You will also see a list of action buttons, that will vary depending on the status or this order:
- Print: will open a new browser window with the pdf version of this order.
- Print as quotation: will do the same as “Print”, but the document will have the header “Quotation” instead of “Order”.
- Invoice order: will transition the order to the “Invoiced” state and generate a new invoice for this order (note that an order in this state cannot be modified).
- Email customer: will send an email to your customer with the pdf of this order as an attached document.
- Cancel order: will transition the order to the “Cancelled” order. No further actions will be possible on this order.
The other tab of this screen “Order detail” lets you manage the products included in this order:
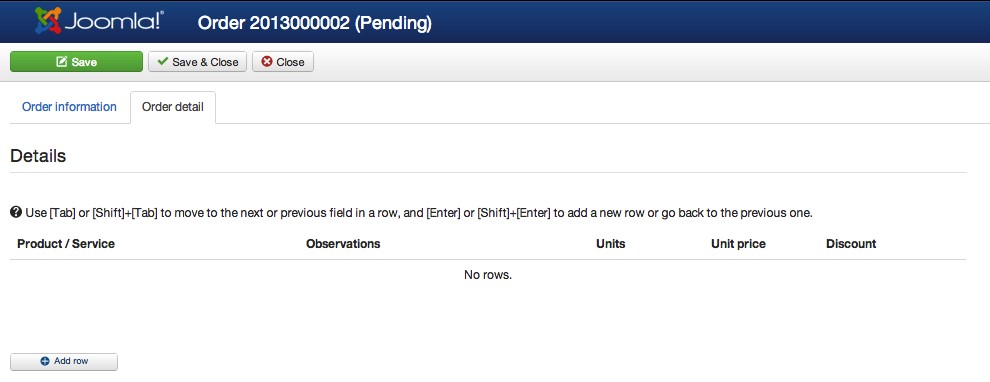
To add the first product row to the table, click on the “Add row” button. Then, you will have to select the product in the first column and fill the other fields on the row:
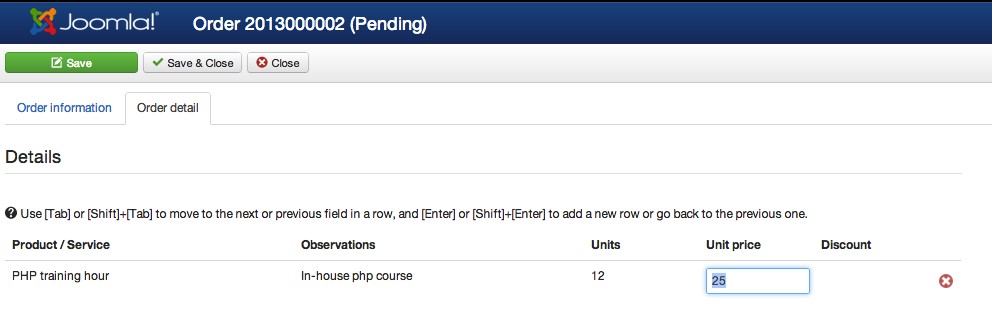
- Observations: details about this row (this field WILL be shown in pdf document )
- Units: how many units of this product belong to the order.
- Unit price: the price of this product for this order. Note that if you setup a unit price lower than the net cost of the product you will se an alert telling you that you are going to lose money with this item. You can create the order anyway, it is just for your information.
- Discount: the percent discount of this product.
As the legend in the table states, you will add rows automatically as you fill the table. Hitting tab will take you to the next col to the left, or if you are in the last one, to the first column of the next row. Hitting Enter will take you to the next row, keeping you in the same column. In both cases, if you hit Shift too, the action is inverted (Shift + Tab goes to the previous field, Shift + Enter goes to the previous row)
5) The order life cycle
As any other ERP software, Easy ERP implements an order lifecycle that defines the different states an order can be in, and the actions you can do on it in each state. But we wanted Easy ERP to be as simple as we could make it so that it could be useful in most cases, so we have the most basic set of states and actions for an order.
An order can be one of this states:
- Pending: This is the initial state for every order. A pending order can be modified by adding or removing products, and also lets you do these actions:
- Print: generates a PDF document of the order.
- Print as quotation: generates the same document but with the heading “Quotation”, instead of “ORDER”.
- Invoice order: create an invoice for this order and transition it to the “Invoice” state.
- Cancel order: transition this order to the “Cancelled” state.
- Email Customer: generate the pdf and send to the customer attached in an email.
- Cancelled: If you click on the “Cancel order” action button, your order will be cancelled. This means that you won't be able to modify it (add or remove products, change units, etc) nor do any other state transition on it. The only available actions will be “Print” and “Print as quotation”.
- Invoice: When you click on the “Invoice order” action button in an order, then a new invoice is generated in the system, and the order transitions to the “Invoice” state. In this state you cannot modify the order (add or remove products, nor change units or prices) and the only actions available will be “Print” and “Print as quotation”.
6) Invoicing
When you click on the “Invoice order” action button of an order, a new invoice is generated in Easy ERP. An invoice is a new artifact, related to the original order, that contains the data of the items sold, the customer and payment configuration for this order.
Customer and products data is copied to the invoice when it's generated, so that you can change them afterwards without braking any previously generated invoice. You can, for example, delete old products you won't be selling anymore and your old invoicing information will still be complete.
An invoice also has a lifecycle that contains these states:
- Pending: A pending invoice has not been paid, but is still in time.
- Charged: An invoice transitions to charged when you register its payment through the “Register payment” action button.
- Overdue: A pending invoice transitions automatically to this state when the payment date passes.
- Refunded: You can generate a refund for any invoice by clicking in the “Generate Refund” action button. Easy ERP will generate a new invoice (a “rectifying invoice”, with a different sequence) with a negative value equal to the invoice total.
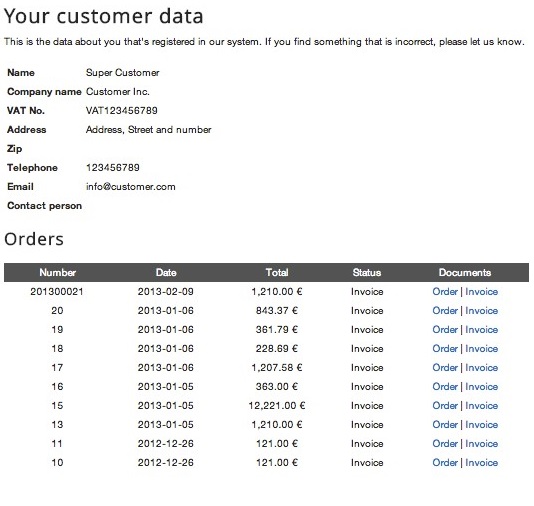
7) Creating a private area in frontend for your customers
Although most of the work you do with Easy ERP takes place in the administrator backend, there is also an important feature that you can use in the frontend: a private area where your customers can access to and review and download their orders and invoices.
As we saw when we talked about creating customers, you can assign a Joomla user to each customer, so when they log in in the front end they can access to their private area. To create that private space, you have to register a Menu Item of the type “Easy ERP > Private customer area”:
- Go to the Joomla Menu where you want the menu item to be shown.
- Click on the “New” button to create a new Menu Item.
- Click the “Select” button to choose the Menu Item Type
- In the dialog to choose the Menu Item Type, choose Easy ERP > Customer Private Area
- Fill the other required fields, and make sure to choose the “Registered” Access level
Once the Menu Item is created, when a frontend user logs in he will see a “Your Private Area” link