
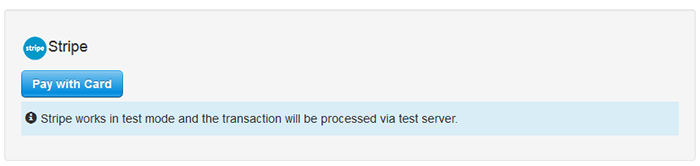
This plug-in enables payments via Stripe Connect. Using this option for payment, the project owner will be able to connect his account to your Stripe platform.
When someone would like to make a donation, the system will create a "card" record to the platform. When campaign completes successfully, you will be able to capture or void transactions.
If you capture the transaction, the system will send the money to the project owner account and fees to your Stripe platform account. If you void transactions, the system will remove registered earlier "cards" from your platform.
Requirements
JoomFunding Finance must be enabled because you have to enable its plugin JoomFunding - Payout Options. You will have to enter secret key, publishable key and client ID in the options of the extension.
You have to enable project wizard in six steps because the plugin JoomFunding - Payout Options will be displayed on step "Extras".
How does it work?
- Project owner connects its Stripe account to your Stripe platform via JoomFunding - Payout Options.
- When someone makes payment, your platform will register a transaction.
- When a campaign completes, you will have to capture or void those transactions using the transaction manager on your crowdfunding platform.
- If you capture a transaction, your Stripe platform will transfer the money in the project owner account and fees in your account.
- If you void a transaction, the system will delete the pre-authorized transaction from your Stripe platform.
Options - Advanced Tab
Some additional options that will help you to customize the payment process.
- Additional Information - Write information that you would like to provide to the user who is going to make donation.
- Company Name - The name of your company or website.
- Image - A relative URL pointing to a square image of your brand or product. The recommended minimum size is 128x128px. The recommended image types are .gif, .jpeg, and .png.
- Panel Label - The label of the payment button in the Checkout form (e.g. “Subscribe”, “Pay {{amount}}”, etc.). If you include {{amount}}, it will be replaced by the provided amount. Otherwise, the amount will be appended to the end of your label.
- Button Label -The text to be shown on the default blue button.
- Validate Zip Code -Specify whether Checkout should validate the billing ZIP code.
- Include Remember Me -Specify whether to include the option to "Remember Me" for future purchases.
How to configure Stripe Connect?
- Make sure JoomFunding Finance Component is enabled and enable its plugin JoomFunding - Payout Options.
- Enable the plugin JoomFunding - Payout Options. You will have to enable Stripe Connect by its options. There is an option Redirect URL that you will have to copy and paste in the platform.
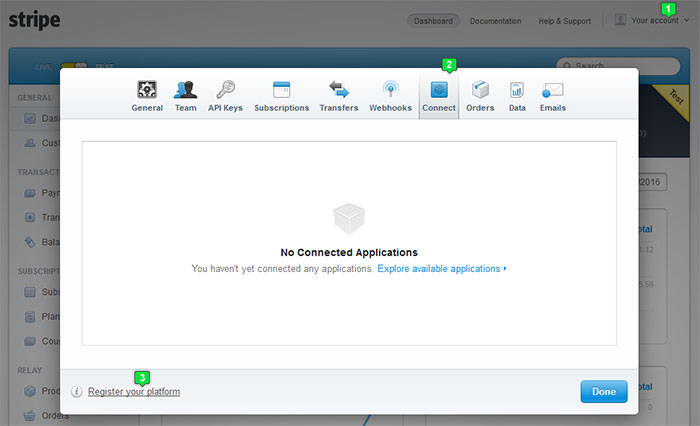
- Go to your Stripe account and register a platform on your dashboard.
- Copy the redirect URL from JoomFunding - Payout Options and paste it in the field Redirect URIs on the platform.
- Open JoomFinding Finance options and select tab Stripe Connect. Enter Client ID, Secret Key and Publishable Key. You will find them in your Stripe account settings. You will find the client ID on the page of the platform and the secret key and publishable key in tab API keys.
- Enable the plugin JoomFundingPayment - Stripe Connect.
How to test payment process?
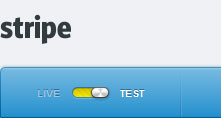
Stripe provides development environment where you can test payment process without real money. There is a button on your dashboard that you should use to switch your Stripe account to test mode.
I strongly recommend you to create several Stripe accounts that you will be able to use to test the payment process.
- Corporate account - that will be your business account. You will register the platform in this account. The system will use it to manage transactions and collect fees.
- Merchant account - use that account to connect project owner to the platform. That account will receive the money from a campaign.
- Customer account - that account will be used to make payments. You will find a list with credit card numbers and bank accounts for testing on the page with information about testing.
Follow next steps to test the payment process:
- Go to step "Extras" on project wizard and connect the merchant account to the platform as project owner.
- Make payment using the customer account.
- Go to your crowdfunding platform administration, section "Transactions" and capture the transaction.